
In this series, we will try and give you a few tips and tricks, some rules and some guidelines to make it simpler and easier for you to pose different models and different body types, regardless of their experience.
Please keep in mind, that posing guides are great for getting ideas about what a body will look like in a specific pose or setting, but not all poses work for everybody and forcing them to try and fit, is sometimes worse than just letting the subjects natural posture take over.
These are all guides. Treat them as such, and you should have some good images at the end of your shoot.
As you go along I will be presenting a lot of ideas about the body of the person you are photographing. A lot of it is compositional strengths, and the rest is simple body language. Just like a Photographer can copy natural light to give a certain effect, Just so we can let our models and subjects mimic day to day attitudes to make an image stronger, or present a mood or feeling in our images.
Best of all, Just like anything in life, practicing the various guidelines and tips makes it easier to pull into your shoots when guiding your models. The more you do it, the better and easier it becomes, and the more confident you come across as a photographer and professional service provider.
What is Flow Posing?
“Flow Posing” is simply a system that you develop for yourself where you set certain markers for yourself from where you move your subject to a new pose, or new position as natural as possible.
Every photographer will have a different system depending on their style and their preferences. I have a very definite preference for pushing my main light to the left of the scene, and so, my poses tend to rotate around that. yours might be shallow DOF, or you might be shooting catalogue style with Deep Etching (White Isolated models) – Your style will have a big impact around the flow you create.
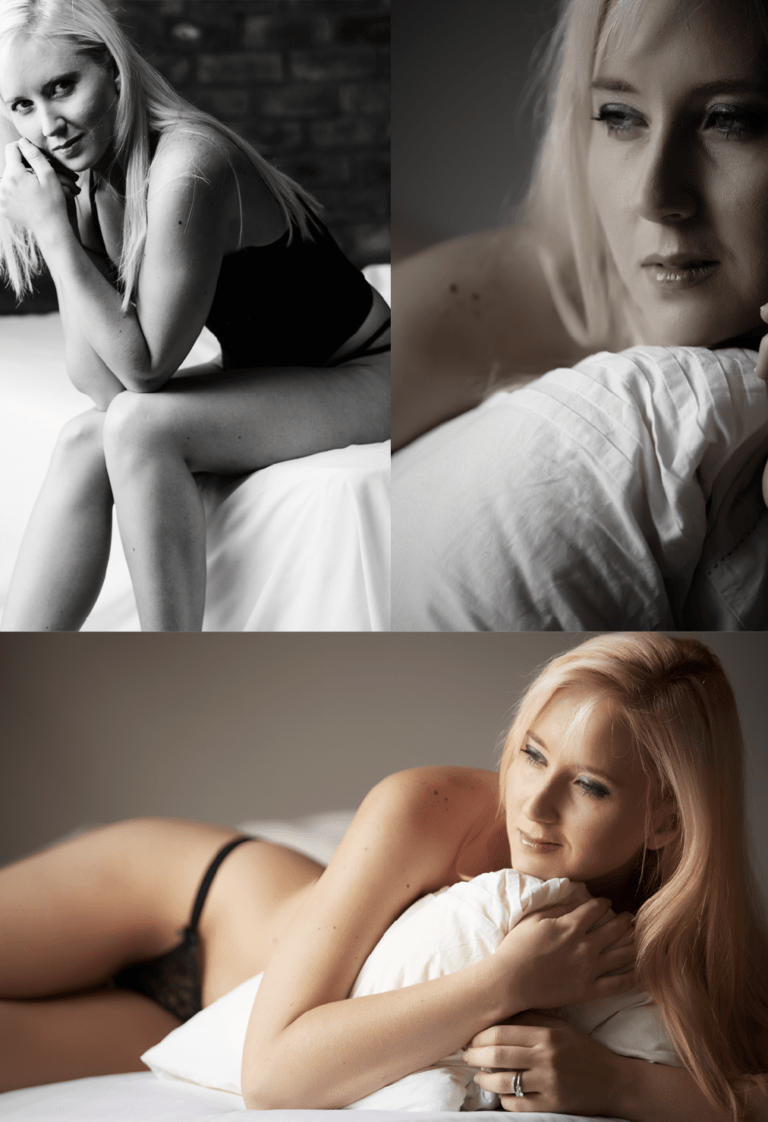
For instance: If you shoot boudoir, your flow might include standing next to a couch or bed, moving to sitting on the edge, moving to lying on the side, moving to lying on stomach and ending up with sitting on knees….
By moving around the sequence, in sequence, you build up specific shots you know works, and the shots in between are your bonus shots.
IMPORTANT! For the Photographers:
You are the photographer – You are the artist, you need to decide what is the message you want to convey, and what is the things you want to show in a picture… This you need to decide the feeling of the images and the mood you want your images to create. What is the story you want to tell? … and you need to decide that before you start shooting…
More often than not, you will also get excellent extra shots that is not quite the look you were going for, but you will get more if your shoot has planned goals and outcomes.
Come in with a plan. Don’t shoot without a strategy. If something happens and you get sidetracked by great photos, then it’s awesome, but you always have your fallback position of your planned shots and poses, which may also be the shots and poses your client is expecting to see. You may never be caught out by indecision or a “blank” – you are a professional, it’s your job to know how to pose them to look good. You want to charge as much as a surgeon? Well you don’t want your surgeon to stand next to your bed, looking at your organs going… “Hmmm… That doesn’t look quite right. Let’s try something else…”
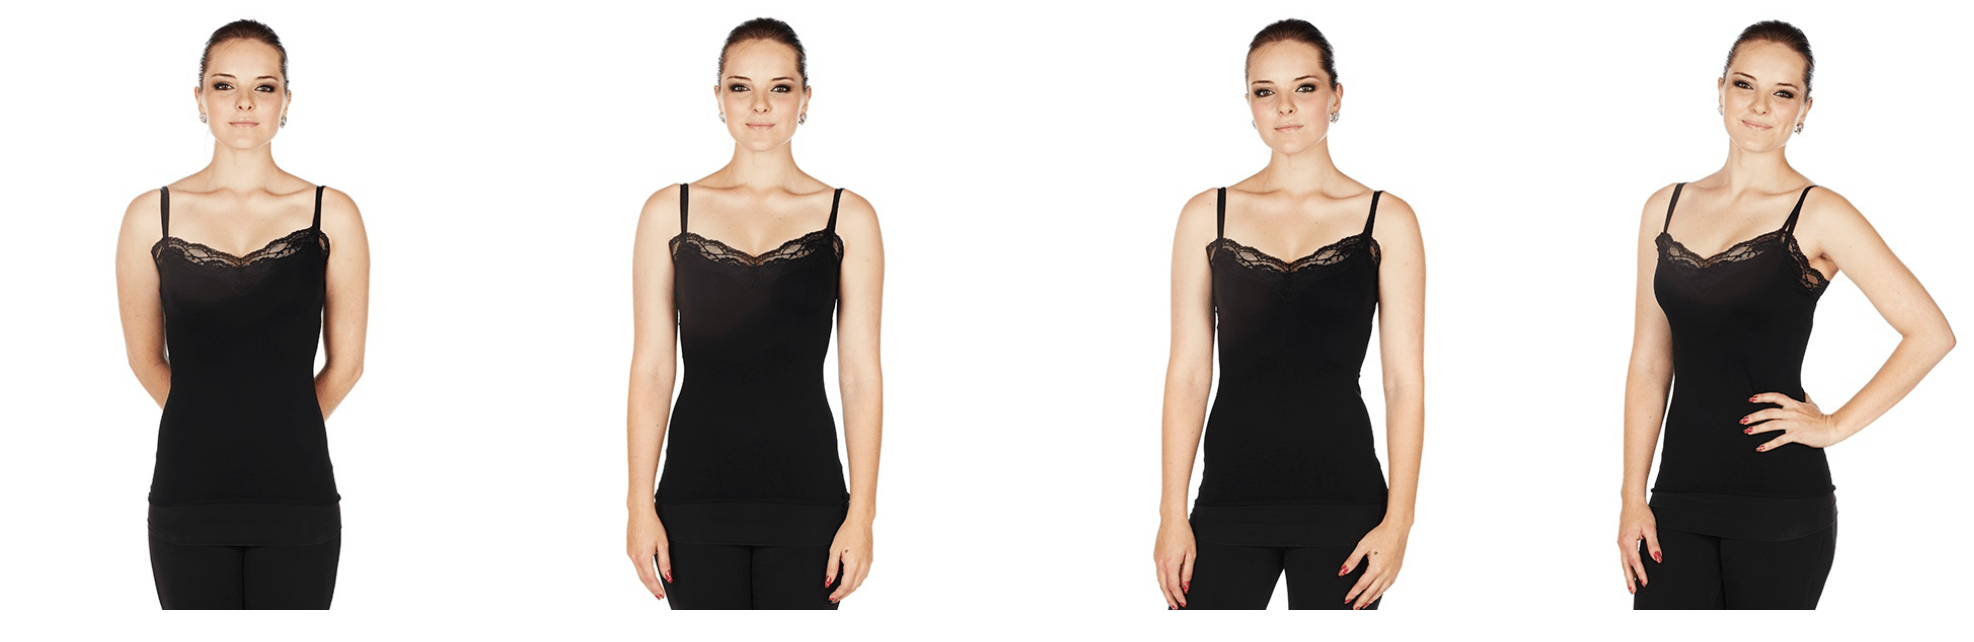
Posing rule: be clear and specific in your directions. Tell your subject exactly what you want. Show them exact points to look at, use your hands to guide them. Tell them exactly what you want them to feel. Tel them exactly where their toes must point to.
This is an extremely important point. You need to be a master of communication otherwise chaos ensues. If your communication is clear and direct, you will get exact response. The subject or model will move with confidence and you will get better images. “Please turn your face to the main light. Let your nose point to the foot of the light stand. Now turn your shoulder slowly in my direction until I tell you to stop. Great, now eyes up and straight into my lens. Perfect. Hold for two shots!”
Don’t create an emotion… Feel an emotion and it will create itself. If you tell somebody to “smile”, they will smile with their mouth, but it doesn’t transfer through their face or their body. The small clues we unintentionally look for to associate emotion isn’t there if the emotion is fake, so the images do not connect as strongly to the viewer. Rather tell your subject to ‘feel’. If they can “feel” happy then they will look happy. If the feel sad, they will look sad. If they feel strong, they will look strong.
This is how actors do it, how they come across as believable. We all have emotions, and we run through many of them every hour of every day. Coax the emotions out of your subject by guiding them through a thought process.